| IC - Version 1.1.7 |
Why yet another image viewer? Short answer: because we needed it. Well, and because it is not just a viewer.
IC was in its original incarnation an internal tool to test features and functionality of our image library.
The library itself is designed to do accurate image manipulation, not only for common palette, grayscale and 8bit/sample (24bit) RGB images, but also for 16bit/sample and for high dynamic range images (HDRI). Alpha/opacity channels are also fully supported for all formats.
Our library does load and save the most common image file formats (see Supported File Formats) and implements full color management (by using ICC profiles or any other colorimetric information, depending on the used file format). It handles all internal transformations in a linear (not gamma corrected) color space and generates proper into sRGB color space transformed output for display purpose or simple 8/24bit file output (like bmp, png or jpeg files).
Finally, downsampling the bit-depth to 8bit/sample values is not just done by accurate rounding but also by using a 'Bayer grid' to loose as less precision as possible and avoid any color banding.
While testing and debugging the library IC evolved and now we think it might be useful to a broader audience and present it to the public free of charge - see the License.
Microsoft Windows Vista/Windows 7,8,10 64bit Operating System.
Microsoft Windows 95/98/ME/NT/2000/XP will not work.
For this 64bit release a 64bit CPU and a 64bit operating system is required. Note that the TWAIN interface will only work with a 64bit DSM (TWAIN sata source manager).
There is currently no Windows installer available, and probably never will.
But installation is easy. The zip-file contains a directory called IC. Simply unzip the archive and copy the folder called IC
to the place where you store your programs (usually this would be 'C:\Program Files\IC'). Thats it.
Open the folder named IC and double click the program file IC.exe - and it will run.
When first launched it will automatically create a new directory 'IC' at
'C:\Documents and Settings\USERNAME\AppData\IC' *,
to make sure every user can keep his own preferences and settings.
* with a non english version of the operating system, the directory names of the paths are different.
You can also create a shortcut on your desktop (right click IC.exe, move it to the desktop and select 'create shortcut
here'), this is quite useful as you can simply drag and drop any supported image file to that shortcut icon, and IC will open
it. You can use the same method to create a shortcut within the Windows start menu.
Right click on the filetype you would like to associate with IC (e.g. 'sunset.jp2' if you want IC to open all jpeg2000 files
with the 'jp2' extension). Within the popup menu choose 'Open with...', and then 'Select program...'. A dialog appears. If
done for the first time IC will NOT appear in the icon list, so you have to click 'search' and then select the location you
have previously installed IC.exe.
Now make sure the box 'Always open with selected program' is checked - and you are done.
When doing this multiple times it should become easier. IC appears from now on in the icon list of the dialog box. After some
time of usage Windows even offers you IC directly in the 'Open with...' menu, but I have no idea why and when Windows decides
to do so.
The program does not add anything to the Windows registry and does not change anything else, so all you have to do is:
delete the folder called 'IC' where you installed it and also the folder 'IC' within 'Application Data' as mentioned above.
Used to display the currently opened image file, gives you access to all functionality by using the main popup menus or - if
in focus - by using the hotkeys.
The main window is either in 'window' or in 'full screen' mode, to switch between them just double click with the left mouse
button or use the space-bar. Use the main popup menu and select 'Options > Window mode' or 'Options > Full screen mode' for
options how images will be displayed.
While 'window mode' is active you can switch between 2 ways how the image is displayed and zoomed:
When 'fit image to window' [F5] is selected the displayed image size is dynamical adapted to the main window size. Resize the
window to change the viewed image size. The titlebar of the main window shows the actual viewing ratio in percent. The window
scroll bars will never be visible in this mode.
When 'fit window to image' [F6] is selected and a new file is opened the main window size is adapted to the image size but with
respect to the screen resolution - so images that extend the screen resolution are 'zoomed out' to fit into the window. Zooming is
done in integer ratios as show in the title bar (e.g. [2:1] for zooming in or [1:2] for zooming out). When the image does not fit
into the viewing window the horizontal and/or vertical scrollbars become visible.
Finally 'fit nothing' [F7] behaves the same way as the previous with the exception that no attempt is made to fit the window size
to the image size when a new file is opened.
You can quickly change the viewing mode by using the hotkeys [F5] to [F7].
You can always zoom in and out by using the [+] and [-] keys on the numeric keypad or the mouse wheel when it is mapped for zooming
- see the section 'Mouse Scroll Wheel' below. In case 'fit image to window' is not selected you can also use these keys (or
the mouse wheel) together with the [Ctrl] key to also switch the window size to fit to the current zoomed image size.
You can drag'n'drop any supported image file or an 'ICA' file (see Working with 'Actions') into the
display window to open it.
Whenever an image file is opened (either by using the 'File open' dialog or drag'n'drop) IC creates also an internal directory
listing for all supported image file formats. So you can use the [up], [down], [home] and [end] keys of the keyboard (or the
mouse scroll wheel - see the section 'Mouse Scroll Wheel' below) to switch to the previous or next file within the current folder. The sort order is alphabetically
by default but can be changed within the 'List' window.
IC always dereferences file-links. This makes it possible for you to e.g. arrange 'themed' groups by creating folders and
just fill them with links to image files from various locations (without actually copying or duplicating the files).
You can also drag'n'drop any folder into the main window and - in case the folder contains any supported files - IC will open
the first file within that folder.
If the currently opened image file has an alpha channel, you can switch its usage on/off by selecting 'Image > Use alpha' from
the main popup menu (or simply use the 'multiply' key on the numeric keypad). This does only change the way the image is
currently displayed in the main window.
But there are two situations when this setting will actually change the image itself. When you select 'Image > Alpha channel
> Remove' the image will be composed with the current background color when 'Use alpha' is selected otherwise the image
background color is used. So for short: WYSIWIG 'what you see is what you get'. The same happens when you are going to save
the image but select a file format that does not support alpha channels.
GIF and PNG files may specify a background color that should be used. In this case IC will temporarily (as long as this file
is opened) overwrite the user setting for the background ('Options > Background color...'). If you do not like this behaviour
you can turn it off with the 'Image > Use background' option. But in fact this is quite rarely used anyway.
Right click with the mouse anywhere in the display window and you will get the main popup menu. You can also press the F10
key or the 'Menu' key on your keyboard.
In addition there is also a shortcut by using this together with the [Ctrl]-key for the window/fullscreen options popup menu.
Move the mouse to the IC logo (top-left in the titlebar of the viewing window) to get some quick info about the image
dimension, pixel mode, presence and usage of alpha channel. In fullscreen mode simply move the mouse to the top-left corner
of the screen.
The mouse wheel is either mapped for zooming (default) to the [+] and [-] keys on the numeric keypad or for
browsing to the [up] and [down] keys.
To switch between the two modes simply click the scroll wheel or use the popup menu 'Options > Mouse Wheel'.
| I | toggle the 'Info' window on/off |
| H | toggle the 'Histogram' window on/off |
| L | toggle the 'List' window on/off |
| A | toggle the 'Actions' window on/off |
| Ctrl O | 'Open image' dialog |
| Ctrl S | 'Save image' dialog |
| Ctrl A | 'Acquire image' TWAIN dialog |
| Ctrl C | copy image to the clipboard |
| Ctrl V | paste image from clipboard |
| P | 'Palette' dialog |
| T | 'Tonemapping' dialog |
| C | 'Color Filter' dialog |
| G | 'Gauss Filter' dialog |
| R | 'Resample' dialog |
| O | 'Crop' dialog |
| E | 'Expand' dialog |
| R | 'Rotate' dialog |
| W | 'Write Text' dialog |
| 1 | 'Affine Projection' dialog |
| 2 | 'Perspective Projection' dialog |
| 3 | '3D Projection' dialog |
| M | mirror image left/right |
| Shift M | mirror image up/down |
| X | rotate image clockwise 90° |
| Ctrl X | rotate image 180° |
| Shift X | rotate image counterclockwise 90° |
| Ctrl Z | undo last image operation (action) |
| Alt Z | redo last image operation (action) |
| Ctrl B | switch usage of image background color on/off |
| Ctrl W | switch 'Warning messages' on/off |
| Ctrl I | switch 'Ask if image has changed' on/off |
| Ctrl M | switch 'Multipage dialog' on/off |
| Ctrl T | switch 'Show dialog tips' on/off |
| F8 | switch 'Autofocus' on/off |
| B | 'Background color' dialog for the viewing window |
| Shift D | switch 'Dithering to 8bps' on/off |
| Ctrl D | set 'Dithering to 8bps' to ask |
| D | 'Digital Camera RAW Import' options dialog |
| K | 'Kodak PhotoCD Import' options dialog |
| F | fit the window to the current image size (if possible). |
| Ctrl F | show the image at 100% [1:1] resolution and fit window to image (if possible). |
| Spacebar | toggle fullscreen mode on/off |
| Return | show the image at 100% [1:1] resolution (if possible) |
| Ctrl Return | same as Ctrl F |
| Numpad + | zoom in |
| Numpad Ctrl + | zoom in and fit window to image. |
| Numpad - | zoom out |
| Numpad Ctrl - | zoom out and fit window to image. |
| Numpad x | switch usage of image alpha channel on/off |
| F1 | Help (this HTML document) |
| Alt F1 | 'About' dialog |
| F2 | 'Open image' dialog (same as Ctrl O) |
| F3 | 'Save image' dialog (same as Ctrl S) |
| F4 | open the shell folder where the currently opened image file is located |
| F5 | 'Window mode' fit image to window |
| F6 | 'Window mode' fit window to image |
| F7 | 'Window mode' fit nothing |
| F8 | toggle option 'autofocus' on/off |
| F9 | unused (suggestions welcome) |
| F10 | popup menu |
| Ctrl F10 | popup menu (options window/fullscreen mode) |
| F11 | toggle fullscreen mode on/off (same as 'Spacebar') |
| F12 | slideshow on/off |
| Page up | previous image in the current folder (if any) * |
| Page down | next image in the current folder (if any) * |
| Pos 1 | first image in the current folder * |
| End | last image in the current folder * |
| Del | moves the currently opened image file to the trashbin and opens the next image* |
| Arrow keys | move the visible part of the image within the main window (if scrollbars are visible) |
| Alt X | exit the program |
Trackbars are sub-classed from the standard trackbar controls and by clicking the mouse middle button - or pressing the
spacebar while in keyboard focus - it resets to the default value. For 'fine tuning' a trackbar you only need to hover the
mouse over it (without actually clicking) and use the mouse wheel or the up/down arrows on your keyboard.
When using the mouse and after clicking one of the arrow buttons, the cursor can be moved up down to change speed and
direction of the change.
| bps | Bit Per Sample - the number of bits used for one color (or alpha) channel. |
| spp | Samples Per Pixel - the total number of color + alpha channels. |
| bpp | Bit Per Pixel - the number of bits used for one pixel (bps x spp). |
| ppi | Pixel Per Inch |
When IC opens an image file it will automatically select the best mode to store the image data internally without loosing
information but also without wasting memory. Digital camera raw and Kodak Photo CD files are special cases - as
described here.
After an image file is opened you can freely change the storage mode by using the main popup and select 'Image > Mode'.
| Monochrome | 1 bit/sample, black & white |
| Gray 2 bps | 2 bit/sample, 4 grayshades |
| Gray 4 bps | 4 bit/sample, 16 grayshades |
| Gray 8 bps | 8 bit/sample, 256 grayshades |
| Gray 16 bps | 16 bit/sample, 65536 grayshades |
| Gray half | 16 bit/sample, HDR |
| Gray float | 32 bit/sample, HDR |
| Index 1 bps | 1 bit/pixel, 2 color palette entries |
| Index 2 bps | 2 bit/pixel, 4 color palette entries |
| Index 4 bps | 4 bit/pixel, 16 color palette entries |
| Index 8 bps | 8 bit/pixel, 256 color palette entries |
| RGB 8 bps | 8 bit/sample, 256 x 256 x 256 colors |
| RGB 16 bps | 16 bit/sample, 65536 x 65536 x 65536 colors |
| RGB half | 16 bit/sample, HDR |
| RGB float | 32 bit/sample, HDR |
You have opened a 16 bps TIFF and want to save it as 8 bps (24bpp) PNG file. In this case you'll have to select mode: RGB 8
bps, otherwise - as PNG also supports 16 bps - IC would have written a 16 bps PNG file (IC always tries to avoid loss of
information - unless it is told to do so).
On the other hand, if you want to save the same 16 bps TIFF as JPEG there is no need to change the mode because JPEG does
only support RGB 8 bps (but note the 'warning' that appears within the 'Save image' dialog).
You have opened a simple 24 bpp RGB file and you intend to do multiple operations - let's say change the whitepoint, apply a
gaussian blur and resample it to 50% of its original size. Each of the operations will be done by IC with full floating point
accuracy within a linear color space, but the image will be mapped back to 24 bps sRGB after each operation is complete. This
might result in an accumulation of rounding errors and - more important - during one operation some color components might
have been fallen out of the 0 - 255 byte range and are already clipped before the next operation uses them.
To avoid this, just convert the image to the 'RGB half mode' (or even float if you do not care about memory usage) before you
apply any operation. This is off course not neccessary if just one opearation will be used.
| BMP | Windows/OS2 Bitmap | bmp | read/write |
|---|---|---|---|
| PCX | ZSoft Paintbrush Image | pcx | read/write |
| PNG | Portable Network Graphics | png | read/write |
| GIF | Graphic Interchange Format | gif | read/write |
| JPEG | Joint Pictures Expert Group | jpg, jpe, jpeg, jfif | read/write |
| JPEG-2000 | Jpeg 2000 | jp2, j2k, j2c, jpc, jpf, jpx | read/write |
| JPEG-XR | Jpeg XR/HD Photo | jxr, wdp, hdp | read/write |
| TIFF | Tagged Image File Format | tif, tiff | read/write |
| PNM | Portable A(n)y Map | pnm, pam, pgm, pbm, ppm | read/write |
| PFM | Portable Float Map HDRI | pfm | read/write |
| Targa | Targa True Vision | tga, vst, vda, icb | read/write |
| RAS | Sun Raster Graphics | ras, im1, im8, im24, im32 | read/write |
| SGI | Silicon Graphics Image | sgi, rgb, rgba | read/write |
| PGF | Progressive Graphics File | pgf | read/write |
| WebP | Google WebP Image | webp | read/write |
| RAD | Radiance Image HDRI | rad, hdr | read/write |
| OpenEXR | ILM OpenEXR Image HDRI | exr | read/write |
| Cineon | Kodak Cineon Image HDRI | cin | read/write |
| PCD | Kodak Photo CD | pcd | read only |
| RAW | Digital Camera Raw Formats | * | read only |
| DDS | Direct Draw Surface | dds | read only |
| EMF | Windows Metafile | wmf, emf | read only |
Additional Notes:
File formats with support for alpha (opacity) channels are PNG, JPEG-2000, JPEG-XR, TIFF, TARGA, RAS, SGI, PGF, EXR and DDS.
File formats with support for high dynamic range (HDR) data are JPEG-XR, TIFF, PFM, RAD, OpenEXR and Cineon.
The former Microsoft HD Photo format is now approved from the ISO/ITU/JPEG committee as an international standard under the new name JPEG XR (with the file extension .jxr).
Here is the press release.
* The recognized file extensions for 'RAW' images are: arw, cr2, crw, dcr, dng, eff, erf, kdc, mef, mos, mrw, nef, orf, pef, raf, raw, rw2, srf, sr2, x3f, 3fr.
In case your camera produces a raw file with some different extension, chances are quite good that IC can read it anyway.
Just change the file extension to any of the supported ones and try it. If it works, please send us a mail and we would be
glad to add this extension to the list. If it not works, send us the raw file itself and we will try to make it work in
future versions.
| Mono | Gray 2bps | Gray 4bps | Gray 8bps | Gray 16bps | Gray half | Gray float | Index 1bps | Index 2bps | Index 4bps | Index 8bps | RGB 8bps | RGB 16bps | RGB half | RGB float | |
| BMP | X | - | - | - | - | - | - | X | - | X | X | X | - | - | - |
| PCX | X | - | X | X | - | - | - | X | - | X | X | X | - | - | - |
| PNG | X | X | X | X | X | - | - | X | X | X | X | X | X | - | - |
| GIF | - | - | - | - | - | - | - | X | X | X | X | - | - | - | - |
| JPEG | - | - | - | X | - | - | - | - | - | - | - | X | - | - | - |
| JPEG-2000 | X | X | X | X | X | - | - | X | X | X | X | X | X | - | - |
| JPEG-XR | X | - | - | X | X | X | X | - | - | - | - | X | X | X | X |
| TIFF | X | X | X | X | X | X | X | X | X | X | X | X | X | X | X |
| PNM | X | X | X | X | X | - | - | - | - | - | - | X | X | - | - |
| PFM | - | - | - | - | - | - | X | - | - | - | - | - | - | - | X |
| Targa | - | - | - | X | X | - | - | - | - | - | X | X | X | - | - |
| RAS | X | - | - | X | X | - | - | - | - | - | X | X | X | - | - |
| SGI | X | - | - | X | X | - | - | - | - | - | X | X | X | - | - |
| PGF | - | - | - | X | - | - | - | - | - | - | X | X | X | - | - |
| WebP | - | - | - | - | - | - | - | - | - | - | - | X | - | - | - |
| RAD | - | - | - | - | - | - | - | - | - | - | - | - | - | X | - |
| OpenEXR | - | - | - | - | - | X | - | - | - | - | - | - | - | X | - |
| Cineon | - | - | - | - | - | X | - | - | - | - | - | - | - | X | - |
IC itself supports all modes (and for file import a lot more).
Not all applications seem to follow the format specification when it comes to writing image files. IC will display a 'Warning'
message when it encounters violations to that specification, but will try to read the file anyway. If you have to do with
lots of 'malformed' files you can disable warnings by unchecking 'Options > Warning messages'. Error messages (they do usually
indicate that IC was unable to read the file) are still shown.
As a general note: all image file formats written by IC are valid and do strictly follow the file format specification - no
matter what options you might choose within the 'Save options' dialog. But some other application might not implement all
the supported features of a specific file format (regarding compression, color space, bit depth etc.) so you'll have to check
out what does work and what not if you need compatibility with a specific application. Also some other applications might do
things wrong, e.g. Photoshop CS3 opens and writes any PFM file upside-down flipped.
If you are going to save a file within a format that does not support the current bit-depth or alpha channels (in the way
currently stored by IC) you will see a warning on the bottom line of the dialog.
You can ignore this warning and IC will automatically save the image in a way that provides as less loss of information as
possible. An example: say the current IC image mode is 'float' and you want to save as PNG file. IC would automatically save
it as 16 bit/sample, so if you want just 8bit/sample (or even just a palette image) you should first convert it to the desired
mode (Image > Mode) within IC and then save it.
But you can always save a simple 8 bps image as e.g. an OpenEXR file without a warning - even if this does not make any
sense.
There is a button at the bottom left corner of the 'Save image file' dialog that will allow you to select some options,
depending on the currently selected file format. IC will 'remember' your settings for all option dialogs.
JPEG
Jpeg is always lossy, even if the quality rate is set to 100%. In fact I do not recommend quality settings much above 90%
because the filesize will increase dramatical while the image gets only barely better. For increased image quality try it
with the 'chroma subsampling' checkbox unchecked.
For quite good quality and reasonable filesize (and this is what a lossy format is meant for) try it with quality 85% and
'chroma subsampling' checked.
The 'progressive' checkbox does not influence the image quality, it does change the way image data is represented within the
file. Mostly useful if the file is intended to be viewed by a web browser. If the user has a slow connection, he can see the
full image quite quickly at poor quality, but the quality will steadily improve while more passes are received. IC does
save the file in 1 pass if unselected and in 4 progressive passes if selected.
Arithmetic coding is part of the ISO/JPEG standard and gives usually a better compression ratio without reducing image
quality. But, as it seems, most applications cannot read arithmetic encoded JPEG files. So it is mostly there as, let's say
'proof of concept'. Do not check it if you aim for compatibility.
JPEG2000
Jpeg2000 can be lossy or lossless, therefor the quality rate allocator works different compared to conventional Jpeg. In fact
it might be possible (for a very smooth and noiseless image) that a lossless rate is already reached at, let's say, 70% - and
in this case there would be no difference in image quality and filesize if the rate is set higher.
On the other hand it is not save to assume(at least for very noisy images) that a setting of 100% will always produce a
lossless compression.
In short if you need lossless compression just check the 'Lossless' box and the rate will be adjusted automatically.
The ISO/JPEG2000 standard defines two wavelet kernels:
The 5x3 kernel is reversible (it does not produce any rounding errors) and is quite fast to compute. But, when used with low
quality rates, it will produce visible artifacts more easily than the 9x7 kernel.
The 9x7 kernel does introduce some small rounding errors and is more computing intensive. It may not be used if you need
really lossless image compression but produces less artifacts for higher compression (means low quality) rates.
The 'Quality Layers' do work similar to the 'progressive' option within conventional JPEG (and does not have any influence on
the final image quality). In case the viewing application supports it, it can display the full image instantly at low quality
and increase image quality while more data is received.
The 'Color Format' option describes the way colors are stored internal in the JPEG2000 file. The default is YUV which uses a
lossless conversion method from and to RGB color space but gives usually a better compression ratio.
In case you aim for smallest filesize but still acceptable quality you can also experiment by using the YCbCr color format
with chroma subsampling enabled. This is the same way conventional JPEG stores colors and part of the ISO/JPEG2000 standard,
but be aware that some brain dead applications are unable to interpret this correctly.
JPEG XR
A quite new format designed by Microsoft as HD Photo and now the ISO/ITU/JPEG Jpeg XR standard. It supports from 8/16 bps LDR
up to 16 bps half and 32 bps float HDR (all with or without alpha channel) all modes that are native to IC.
Similar to traditional JPEG it uses DCT compression with optional chrominance subsampling but supports also truly lossless
compression.
The option 'Chroma subsampling' 'off' means subsampling is disabled, '4-2-2' means only every 2nd chroma value is sampled
and finally '4-2-0' results in only one chroma sample for each block of 2x2 pixels.
There is also an option to reduce the typical block artifacts as produced by trad. JPEG by letting the blocks overlap. This
is mostly useful for quite low quality settings.
TIFF
IC supports only lossless TIFF compressions where 'ZIP' together with 'Filtered' checked gives usually the best compression
ratio. The other compression options are mostly for compatibility with (older) applications that might not support all of
them.
You can also save HDR data directly in the half or float formats as supported by IC. But be aware that some applications do
not handle 'Filtered' for half and float (even if clearly specified in the specs).
A special case is LogLUV (only enabled for HDRI - the IC modes half/float). This format was created by Greg Ward Larson as
a successor to Radiance HDR (the widely used HDRI format - also designed by him). LogLUV provides better precision and a
'higher' dynamic range together with usually a better compression ratio. And all this within an already well defined container
format like TIFF so any additional information, like colorimetric specification, comments, metadata and what not can easily
be added. But - for unknown reasons - this LogLUV HDRI format was never widely used.
Radiance HDR
The oldest and still widely used HDRI format.
When used with the XYZ(e) color representation it can save 'out of gamut' color components at the cost of slightly lower
precision where RGB(e) does clip them to zero. And the meanwhile quite usual warning: not all application do read Radiance
XYZ(e) files correctly.
OpenEXR
A HDRI format designed by ILM that supports also alpha/opacity channels and better precision than Radiance or TIFF LogLUV at the
cost of higher bit rate. But it provides also more advanced compression techniques so the filesize is usually not that much
bigger.
The compression methods are roughly ordered by efficiency but this does also greatly depend on the kind of image being
processed (film-grain and noise has a huge impact).
Options for other file formats should be straightforward and self-explanatory.
Actions are used to define any operation that can be applied to an image.
Internal, actions are also used to remember all states of an image editing session. So the 'History' box within the 'Actions'
window allows you to undo/redo all previously applied actions by simply double clicking on them.
The 'Favorites' box allows you to collect your most used operations and reuse them on the currently opened image by double
clicking on them. Or, if you prefer to verify your action, you can use [Ctrl] + double click to bring up the
related image dialog with this action used as preset.
There are three ways to add content to the 'Favorites' box:
Copy the actions from the 'History' box.
Add an action from the internal database (where all already saved settings of image dialogs are stored).
Import a complete set of actions you have previously exported.
You can manage different combinations of actions by using the import and export option. Your favorites will be saved to disk
as a file with the extension *.ica. A saved ICA file can also be used by simply dropping it into the main view window to
apply all action that are stored within the ICA file to your currently opened image.
You can rearrange the order the actions appear (and are performed when 'apply all actions' is used) by clicking on a
action and moving it up or down. Remove a action from the list by using the [Del] key.
Removing an action permanently from the internal database can be done either in the 'open actions' window or in the open/save
action dialog related to each image dialog window.
The checkbox 'always apply when opening images' might be quite useful when you have a selection of images that all require
the same operations to be viewed properly.
Lets say you have a directory with JPEG files that all would need a whitepoint or gamma correction and have also a frame that
should be cropped. Now apply this operations to one of the images, then select 'Copy actions from history', make sure 'always
apply when opening images' is checked and you can view all images in the desired way without actually changing the image
files. Neat. And for later use you can export this set of actions into the same folder too.
All image dialogs support the feature of saving the current settings to use them later again. Simply click the right mouse
button for a popup menu.
The settings saved from within the dialogs can also be accessed from the 'Action'-window and can be added to your 'Favorites'
box - as mentioned above.
You can edit the rgb values of all color palette entries as desired. Simply use the mouse to select from the table or use
the spin box to change the active index for editing.
The 'Sort' option does sort the color table by most used colors first and less used colors last.
This does not make any difference to the image itself, as the indices within the image will also be changed, but might result
in a better compression ratio when saving the image file as PNG, GIF or TIFF.
There are 3 different ways to handle tonemapping, depending on what you want to do:
The image is just a 8/16bit per sample low dynamic range image.
This is the most simple case, you can freely play around with all sliders until the image looks the way you want it.
What you see as a preview is exactly what you will get when you press the 'Apply' button.
The image is a half/float high dynamic range image and you want to tonemap it into a low dynamic range image.
Just follow these 3 easy steps:
Decrease exposure until overexposes areas become visible as desired. The image will now look quite dark.
Then increase exponent until dark areas become visible again. (Try also to slightly lower black to prevent the
image from becoming 'flat'.)
Finally increase chrominance as the 'compression' previously made will also lower the visible color richness. You can
also alter the whitepoint as you wish.
Examples:
 |
 |
Tonemapping HDR into LDR by using the settings: Exposure: 0.56 Black: -0.01 Exponent: 1.35 Chrominance: 135% |
Used for color tinting within the L*a*b color space.
A multipurpose filter for sharpening or blurring.
Some examples:
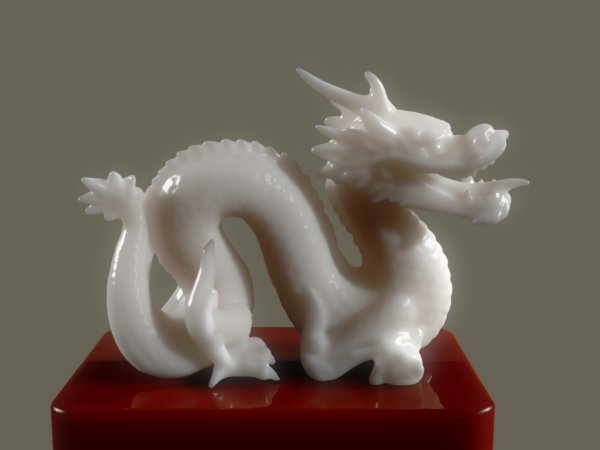
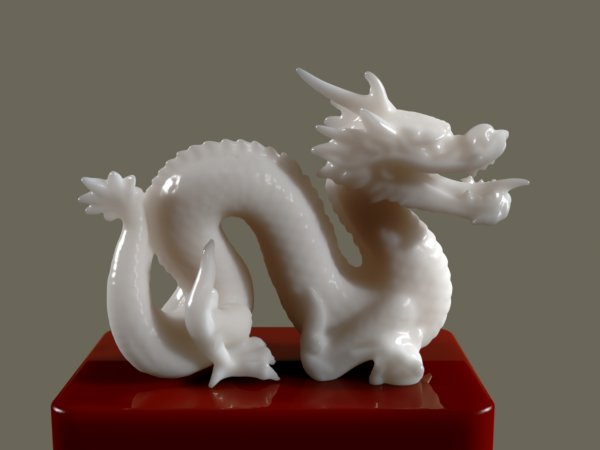 | The original raytraced image featuring the 'Stanford Dragon', a high polycount model produced from the 'real thing' by a 3d scanner. |
 | Some sharpening applied by using the folowing settings: sharpen: 100%; radius: 5 pixel; power: 1.0 Sleightly raising the 'gain' slider may give some additional 'depth' to the image. |
 | Special effect blurring with the setting: blur: 12%; radius: 35 pixel; power: 1.5 Besides the conventional blurring, this filter can be used to produce more 'moody' images when a bigger radius is chosen and the power raised. This does in fact simulate the behaviour of 'classical' chemical film and works especially well with HDR images. |
Just set the requested image size, select the desired filter method and press 'Apply'.
Available filters:
| Box | 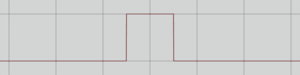 | Also known as nearest neighbour filter. Only use it for palette images or if you want to keep the image 'pixelized'. |
| Cosine | 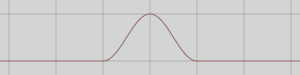 | A simple and fast blur filter. Also usable for HDR images. |
| Gauss | 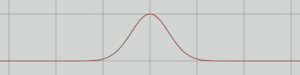 | A multy purpose blur filter, usable for all kind of images, including HDR. Alpha/opacity channels are internal always resampled by using this filter. |
| Mitchell | 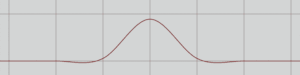 | Does some mild sharpening to compensate for blur effects. Can be used for HDR images in case they have no high frequent range changes. |
| Cubic | 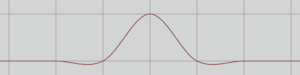 | A high quality filter with strong sharpening to compensate for blur effects. But not suitable for HDR images. |
| Lanczos | 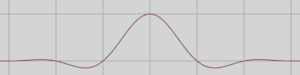 | A high quality filter that fully compensates blur effects and also reduces any kind of moire pattern. Also not suitable for HDR images. |
| Blackman | 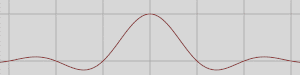 | A high quality filter that fully compensates blur effects and also reduces any kind of moire pattern. Also not suitable for HDR images. |
Use [Ctrl] + [left mouse button] in the preview image to quickly select a crop frame.
Use just the [left mouse button] to adjust the left, right, top and bottom border.
You can also always use the spin boxes to set the desired frame and finally press 'Apply'.
Use the spin boxes to set the desired image size, select the desired border color with the 'Color' dialog and press 'Apply'.
First you should add the desired words into the edit box. Select the desired font, size and style with the [font] button and the
color with the [color] button.
Use the trackbars to rotate, scale and translate the image.
Note the effect of having checked 'adjust image size'.
Use oversampling (2 - 4 is usually enough) before pressing 'Apply'.
Use the mouse in the preview image or the spin boxes to set the desired frame.
Some examples:
 |
 |
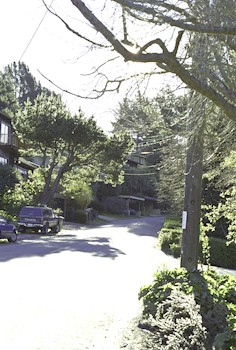
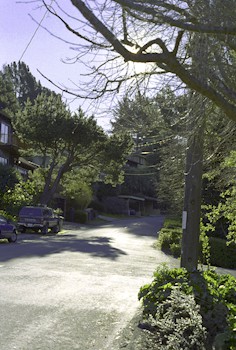
Architectural perspective projection: Make sure 'Mapping: selection to image' is selected. Set the top-left and top-right boxes in a way the selection frame will be aligned parallel to the perspective lines of the houses. Use the two scaling sliders to adjust for possible image ratio distortions (in this case Scale X: 100% and Scale Y: 112.5% was used). Press the preview button and check out what you will get. Remember to use oversampling (2 - 4 is usually enough) before pressing 'Apply'. |
 |
Perspective 3D projection: If the image does not already have an alpha channel select 'Image > Alpha > Add' in the main popup menu (this will add an 100% opaque alpha channel to your image). Make sure 'Mapping: image to selection' is selected. Set the frame in the preview window as you desire. Use the 'Color...' button and in the upcoming 'Color' dialog set the 'Opaque' slider to 0.0%. Press the preview button and check out what you will get. Remember to use oversampling (2 - 4 is usually enough) before pressing 'Apply'. |
This is mostly useful when you are working with some kind of 3D software and need to remap environment or lighting maps. Supported map types are:
For convinience IC assumes for images with equal width and height to be angular mapped, but mapping can always be changed
manually.
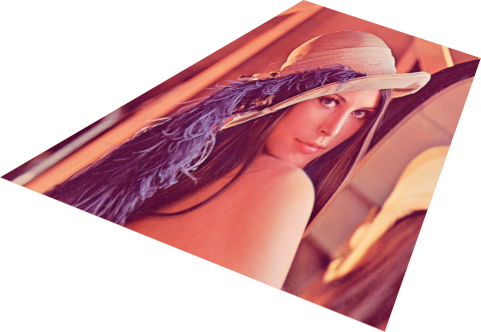
You can also use it with some conventional image to apply just a mirrorball effect. Like this:
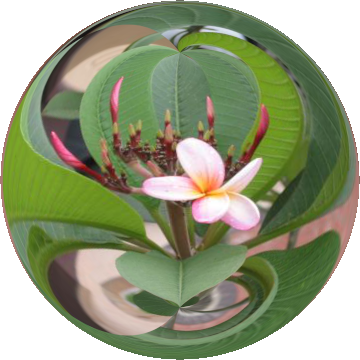 |
Latitude/longitude to mirror ball projection. Looks quite funny with portrait photos and works especially well when the background is uniform. |
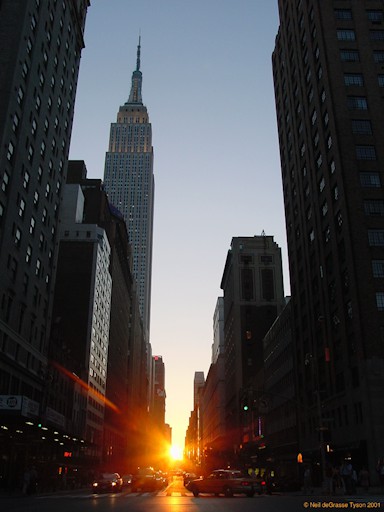
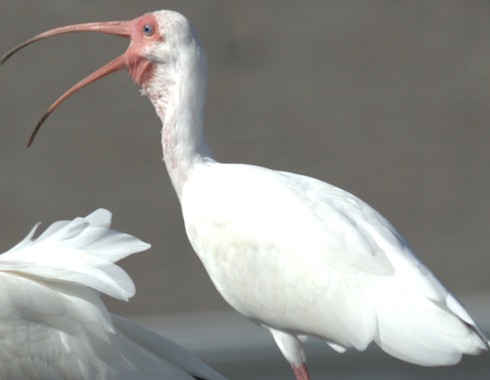
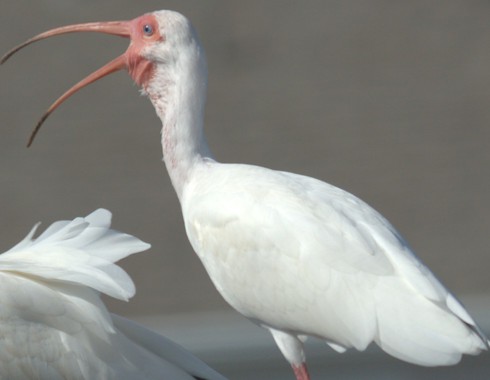
You can use the dialog window 'Options > Image import > Digital Camera RAW' to select some import options.
Usually IC does a good job in mapping the raw data to 8 or 16 bit/sample LDR images. But in some cases you might be able to
recover lost information within highlights by importing into the half/float format:
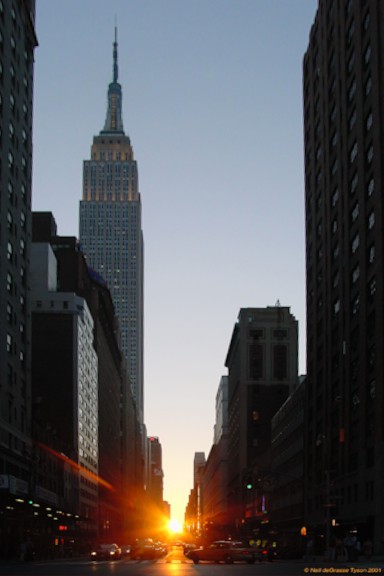
The first image shows the IC import for 16 bit where IC's automated tonemapping did still show some overexposed areas. The
second image is the result when imported as HDR and tonemapping is done manually.
 |
 |
You can select between 3 interpolation methods:
Bilinear is the fastest one and already quite good.
PPG (the default) is a high quality but more computing intensive filter method.
AHD is even more computing intensive and should get better quality - but in most cases you'll have a hard time in seeing
a difference to PPG.
Both noise reduction methods (wavelet and median filter) are very computing intensive and should only be used when really
needed.
... are missing, not yet implemented or maybe just forgotten.
Here is a list of things we are currently missing, somehow ordered according to our priority:
The 'Histogram' window is currently useless for HDR images as it shows only the LD range.
A 'real' print dialog window is completely missing.
No access to automated tonemapping operators from within IC - but they are already implemented in the library.
Animated GIF files are not supported, only the first frame is used - even if our library has no problems in extracting
the whole animation - I'm unsure whether support for GIF animations in an application like IC makes sense at all.
No saving/writing of tiled image files. TIFF, JPEG2000, OpenEXR and HD-Photo file formats would support this.
Feel free to give us some feedback about about the things you miss the most.
IC extracts all metadata it can find and will show you the content within the "Info" window.
Writing metadata when saving an image file is currently limited to add some tags to file formats supporting this. Use the
"Metadata" button within the file save dialog.
You can add tags for "Title", "Author/Artist", "Creation Time", "Description" and "Copyright".
To write a valid creation-time-tag for TIFF and JPEG-XR the entered time format should strictly be YYYY-MM-DD HH:MM:SS and there is currently no error checking.
Writing IPTC/EXIF/XMP is currently not supported but is under developement.
| lcms 2.9 | Copyright © 1998-2017 Marti Maria |
| zlib 1.2.11 | Copyright © 1995-2017 Jean-loup Gailly, Mark Adler |
| LibPng 1.6.16 | Copyright © 1998-2014 Glenn Randers-Pehrson |
| TurboJpeg 1.4.2 | Copyright © 1996-2015 Thomas G. Lane, Guido Vollbeding, D. C. Commander |
| LibTiff 4.0.2 | Copyright © 1988-1997 Sam Leffler, 1991-1997 SGI |
| dcraw 9.08 | Copyright © 1997-2011 Dave Coffin |
| OpenEXR 1.7.0 | Copyright © 2001-2010 Industrial Light & Magic |
| JXR DPK 1.1 | Copyright © 2005-2013 Microsoft Corporation |
| LibPgf 6.12.24 | Copyright © 2006-2012 xeraina GmbH, Switzerland |
| libwebp 0.4.0 | Copyright © 2014 Google Inc. |
| expat 2.0.1 | Copyright © 1998-2000 Thai OS Software Center Ltd. |
| XMP SDK 4.1.1 | Copyright © 2002-2007 Adobe Systems Incorporated |
Program is IC.exe and all accompanying files included in the packaged file IC_1107x64.zip.
The program is distributed free of charge. You can use the program for any purpose you see fit. You can redistribute the
program as long as the contents of the original packaged file are unchanged, but you cannot directly or indirectly sell the
program.
Using the program implies that you agree to the above terms.
Program is IC.exe and all accompanying files included in the packaged file IC_1107x64.zip.
This program is provided "AS IS" without any warranty of any kind, either expressed or implied. The entire risk as to the
quality and performance of the program is with you. Should the program prove defective, you assume the cost of all necessary
servicing, repair or correction. In no event shall the authors, copyright holders, or any other party who may redistribute the
program be liable to you for damages, including any general, special, incidental, or consequental damages arising out of the
use or inability to use the program (including, but not limited to, loss of data, data being rendered inaccurate, loss of
business profits, loss of business information, business interruptions, loss sustained by you or third parties, or a failure
of the program to operate with any other software) even if the author, copyright holder, or other party has been advised of
the possibility of such damages.
Brand and product names referred to are trademarks or registered trademarks of their respective owners.